はじめに
DreamHanksのMOONです。
前回はViewPagerとTabLayoutでタブビュー機能を説明しました。
19. 【Android/Kotlin】ViewPagerとTabLayout
今回はRecyclerViewについて説明していきます。
RecyclerViewとは
「RecyclerView」は、「ListView」とほぼ同じ機能のViewですが、
「ListView」より柔軟なViewです。
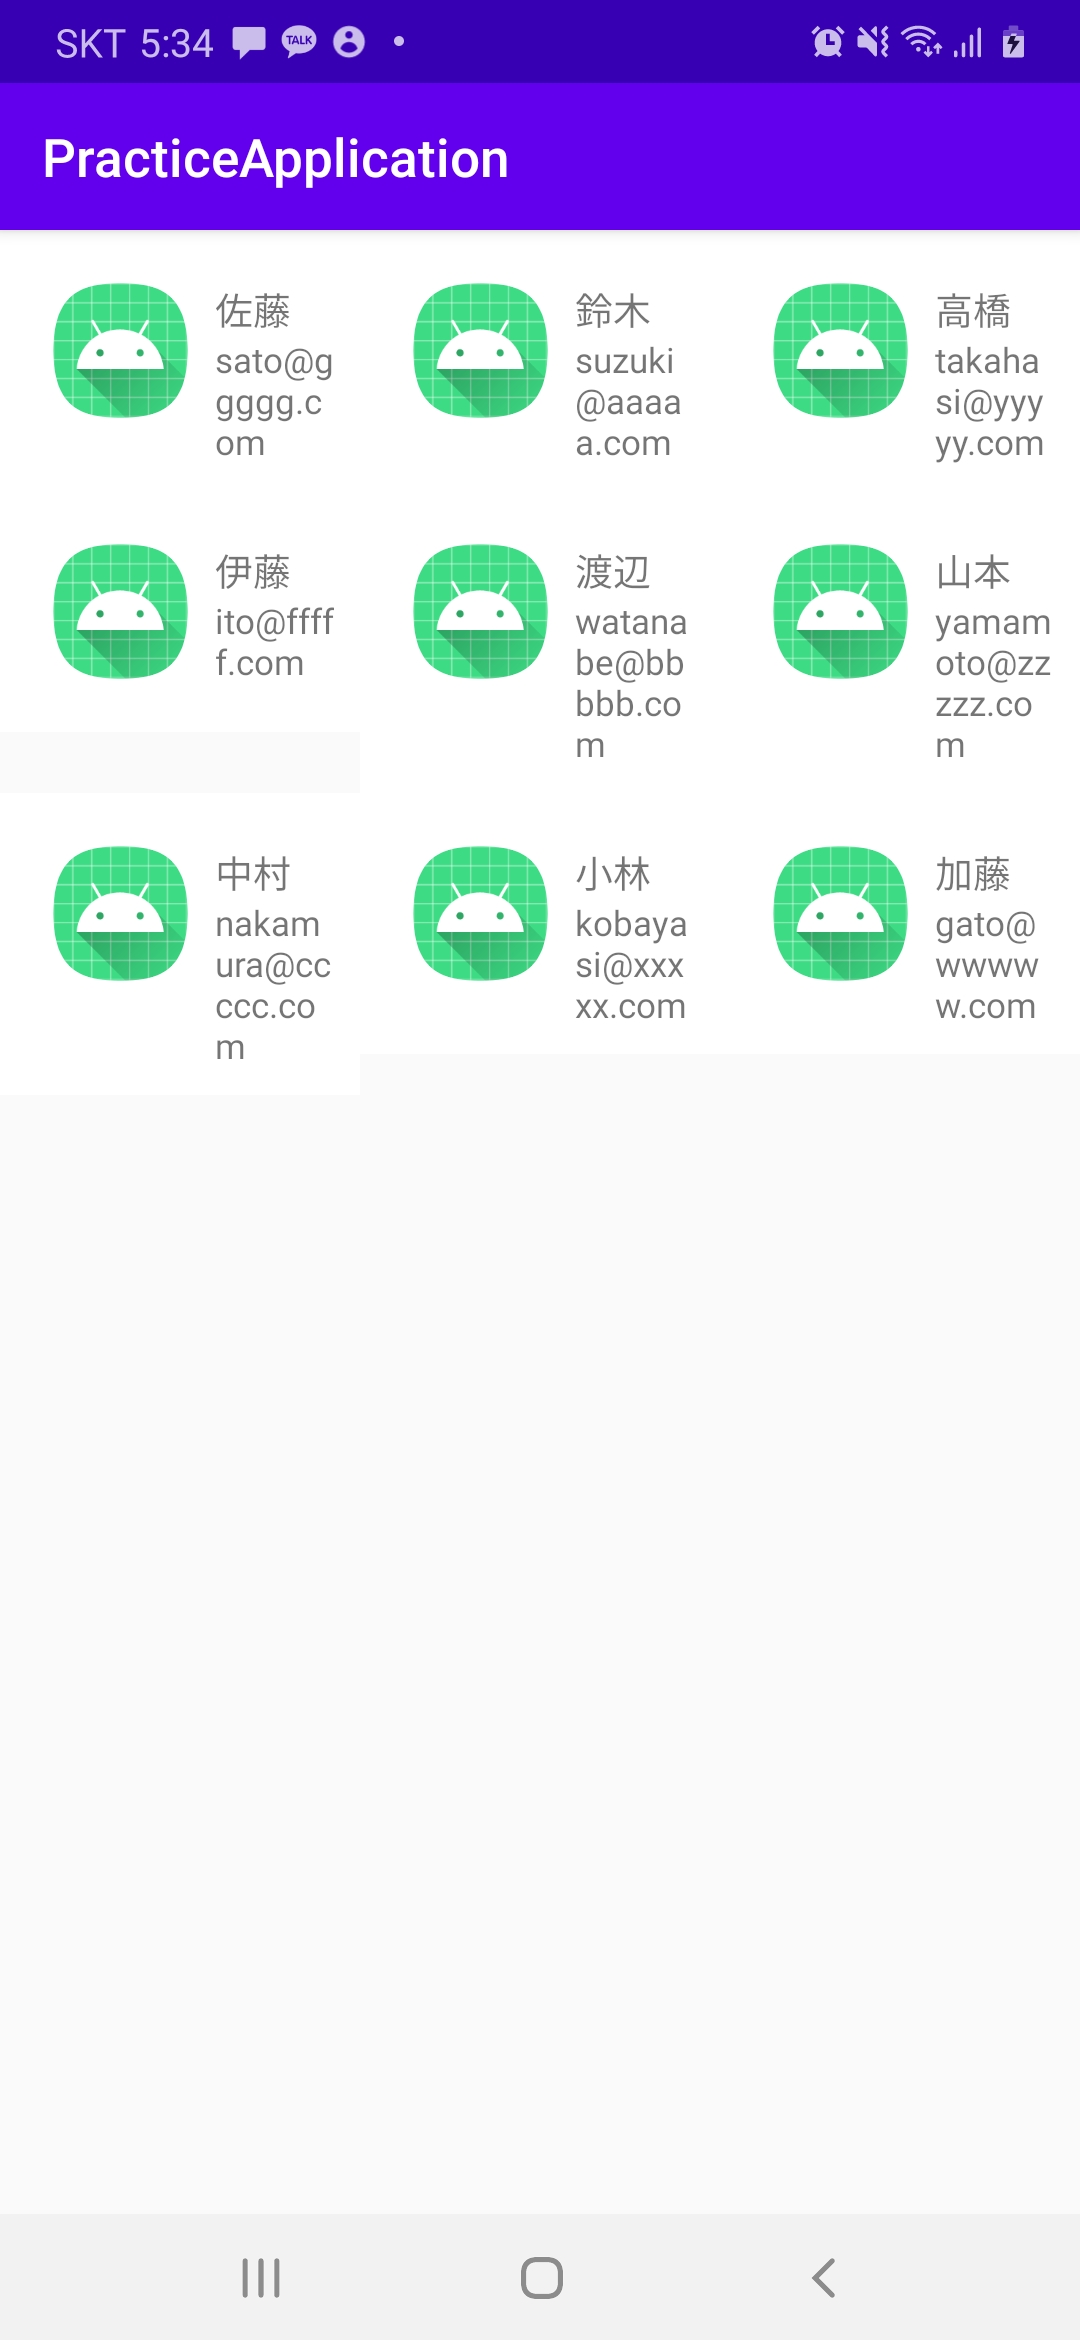
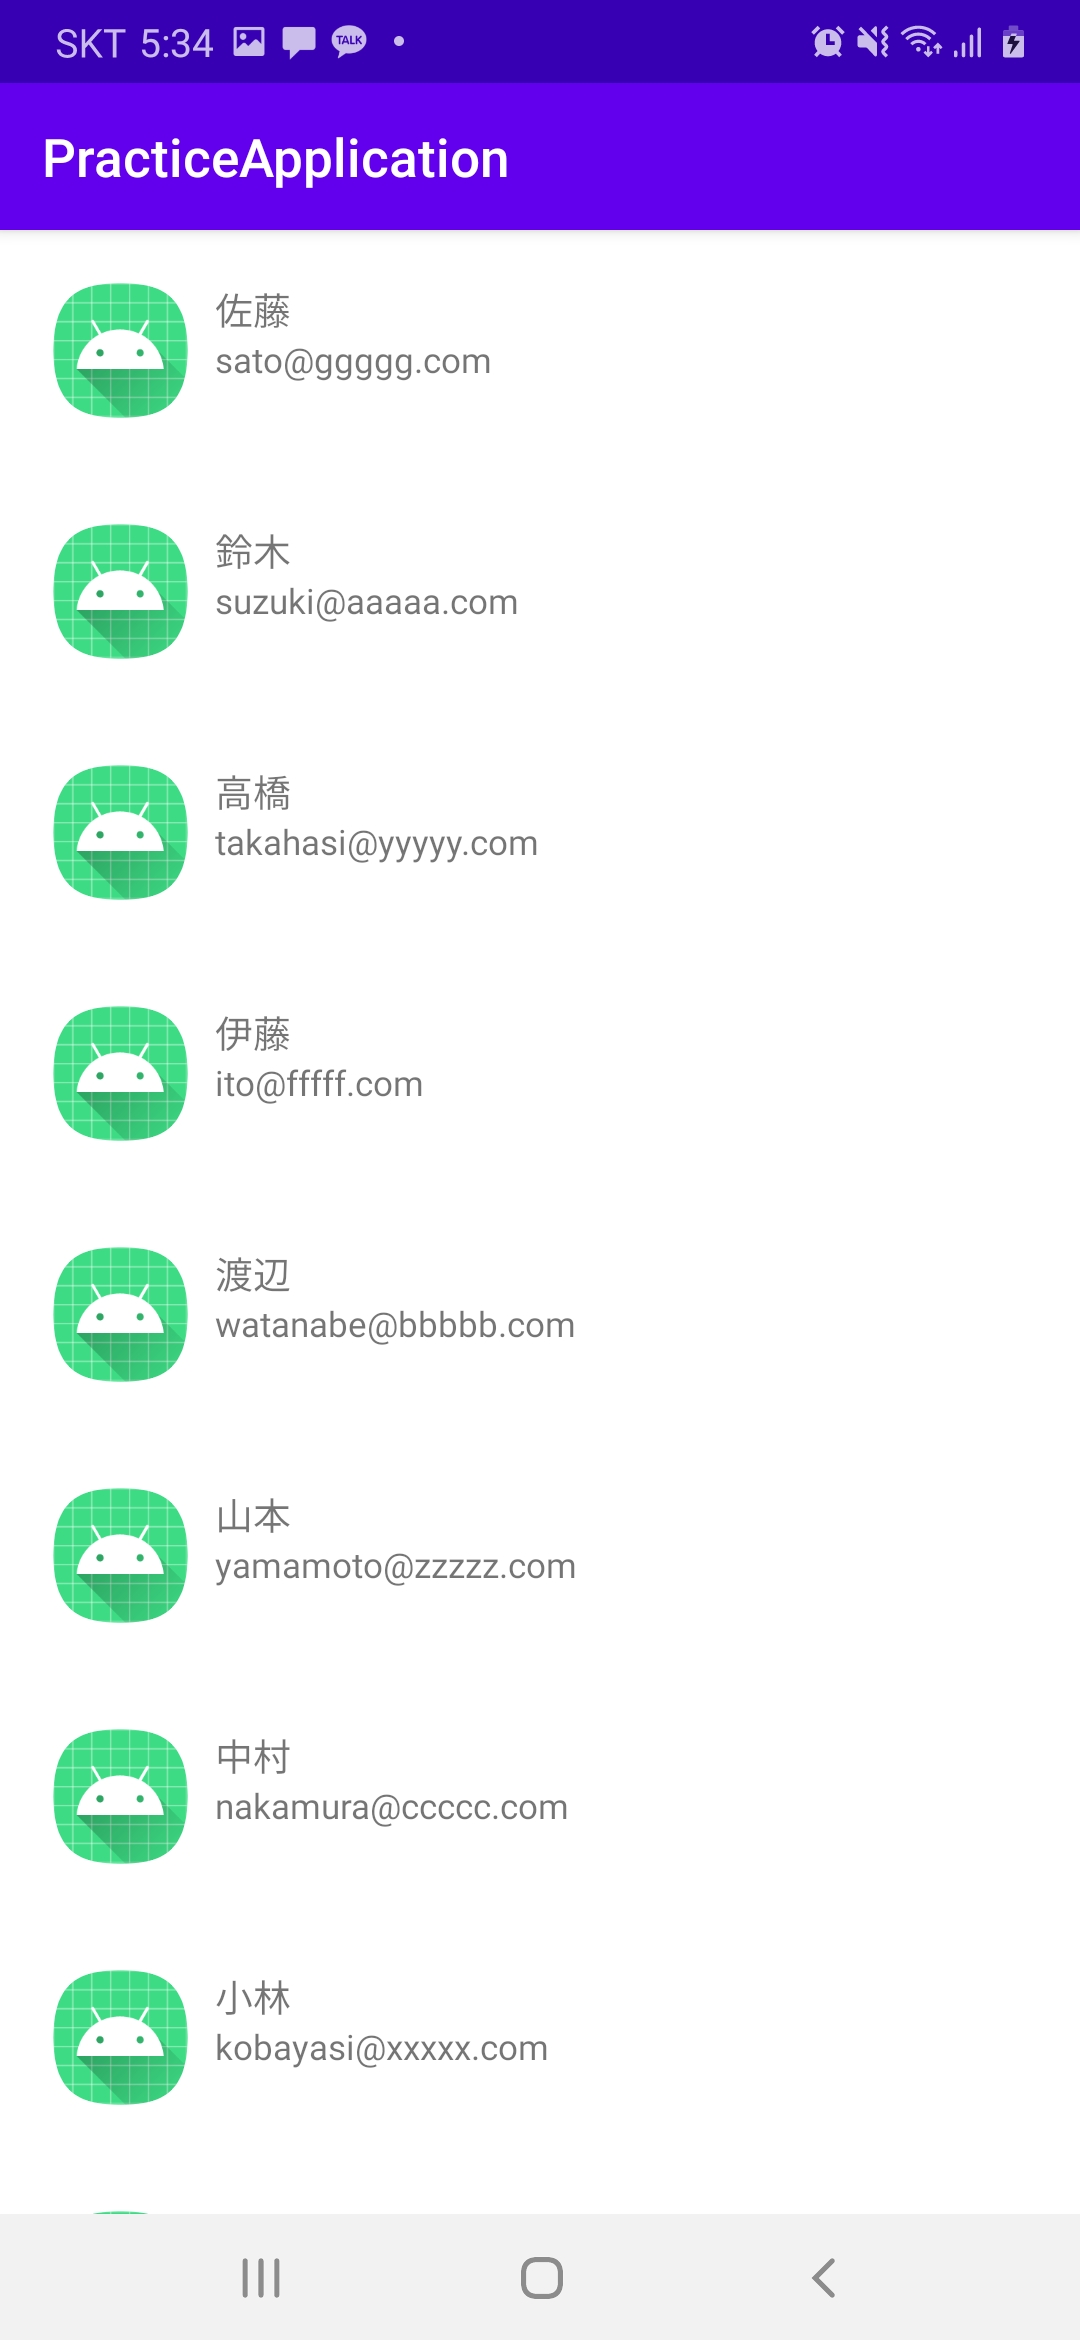
例えば、「ListView」は一つの列に対してのみ出力が可能ですが、「RecyclerView」は同じリストをいろんな列の形で表現することができます。
設定事項
・Gradleに「RecyclerView」のライブラリを追加
・リストのアイテムに対するxmlとktファイル追加
・Viewに対するAdapter追加
・Activity、レイアウトのxmlを設定
Gradleに「RecyclerView」のライブラリを追加
「build.gradle」のdependenciesに下記のコードを追加
|
1 |
implementation "androidx.recyclerview:recyclerview:1.1.0" |
リストのアイテムに対するxmlとclassファイル追加
item_user.xml
|
1 2 3 4 5 6 7 8 9 10 11 12 13 14 15 16 17 18 19 20 21 22 23 24 25 26 27 28 29 30 31 32 33 34 35 36 37 38 39 40 41 42 43 44 45 46 47 48 49 50 51 52 53 54 55 56 57 |
<?xml version="1.0" encoding="utf-8"?> <LinearLayout xmlns:android="http://schemas.android.com/apk/res/android" xmlns:card_view="http://schemas.android.com/apk/res-auto" android:layout_width="match_parent" android:layout_height="wrap_content" android:orientation="vertical"> <RelativeLayout android:id="@+id/firstLin" android:layout_width="match_parent" android:layout_height="wrap_content" android:orientation="vertical" android:background="#ffffff" android:padding="10dp"> <RelativeLayout android:layout_width="match_parent" android:layout_height="wrap_content"> <ImageView android:id="@+id/imageIcon" android:layout_width="52dp" android:layout_height="52dp" android:layout_margin="10dp" android:src="@mipmap/ic_launcher" /> <LinearLayout android:layout_width="wrap_content" android:layout_height="wrap_content" android:layout_gravity="center" android:layout_marginTop="10dp" android:layout_toRightOf="@+id/imageIcon" android:orientation="vertical"> <TextView android:id="@+id/name_tv" android:layout_width="match_parent" android:layout_height="wrap_content" android:textSize="14sp" android:text="佐藤" /> <TextView android:id="@+id/email_tv" android:layout_width="match_parent" android:layout_height="wrap_content" android:textSize="12sp" android:text="sato@ggggg.com"/> </LinearLayout> </RelativeLayout> </RelativeLayout> </LinearLayout> |
User.kt
|
1 2 3 |
package com.example.practiceapplication class User (val name: String, val email: String) |
Viewに対するAdapter追加
RecyclerAdapter.kt
|
1 2 3 4 5 6 7 8 9 10 11 12 13 14 15 16 17 18 19 20 21 22 23 24 25 26 27 28 29 30 31 32 33 34 35 36 37 38 39 40 41 42 43 44 45 46 |
package com.example.practiceapplication import android.content.Context import android.view.LayoutInflater import android.view.View import android.view.ViewGroup import android.widget.BaseAdapter import android.widget.TextView import android.widget.Toast import androidx.recyclerview.widget.RecyclerView import kotlinx.android.synthetic.main.item_user.view.* class RecyclerAdapter(private val items: ArrayList<User>) : RecyclerView.Adapter<RecyclerAdapter.ViewHolder>() { override fun getItemCount() = items.size override fun onBindViewHolder(holder: RecyclerAdapter.ViewHolder, position: Int) { val item = items[position] val listener = View.OnClickListener {it -> Toast.makeText(it.context, "Clicked: ${item.name}", Toast.LENGTH_SHORT).show() } holder.apply { bind(listener, item) itemView.tag = item } } override fun onCreateViewHolder(parent: ViewGroup, viewType: Int): RecyclerAdapter.ViewHolder { val inflatedView = LayoutInflater.from(parent.context) .inflate(R.layout.item_user, parent, false) return RecyclerAdapter.ViewHolder(inflatedView) } class ViewHolder(v: View) : RecyclerView.ViewHolder(v) { private var view: View = v fun bind(listener: View.OnClickListener, item: User) { view.name_tv.text = item.name view.email_tv.text = item.email view.setOnClickListener(listener) } } } |
Activity、レイアウトのxmlを設定
RecycleViewActivity.kt
|
1 2 3 4 5 6 7 8 9 10 11 12 13 14 15 16 17 18 19 20 21 22 23 24 25 26 27 28 29 30 31 32 33 34 35 36 37 |
package com.example.practiceapplication import androidx.appcompat.app.AppCompatActivity import android.os.Bundle import androidx.recyclerview.widget.RecyclerView import kotlinx.android.synthetic.main.activity_recycleview.* class RecycleViewActivity : AppCompatActivity() { override fun onCreate(savedInstanceState: Bundle?) { super.onCreate(savedInstanceState) setContentView(R.layout.activity_recycleview) var userList = arrayListOf<User>( User("佐藤","sato@ggggg.com"), User("鈴木","suzuki@aaaaa.com"), User("高橋","takahasi@yyyyy.com"), User("伊藤","ito@fffff.com"), User("渡辺","watanabe@bbbbb.com"), User("山本","yamamoto@zzzzz.com"), User("中村","nakamura@ccccc.com"), User("小林","kobayasi@xxxxx.com"), User("加藤","gato@wwwww.com") ) var main_rv = findViewById<RecyclerView>(R.id.main_rv) //recycleviewのアイテムを変更 setRecycleView(userList) } fun setRecycleView(userList: ArrayList<User>){ //アダプターにリストを設定 val Adapter = RecyclerAdapter(userList) //recycleviewにアダプターを設定 main_rv.adapter = Adapter } } |
activity_recycleview.xml
|
1 2 3 4 5 6 7 8 9 10 11 12 13 14 15 16 17 18 19 |
<?xml version="1.0" encoding="utf-8"?> <LinearLayout xmlns:android="http://schemas.android.com/apk/res/android" xmlns:app="http://schemas.android.com/apk/res-auto" xmlns:tools="http://schemas.android.com/tools" android:layout_width="match_parent" android:layout_height="match_parent" android:orientation="vertical" tools:context=".RecycleViewActivity" android:gravity="center"> <androidx.recyclerview.widget.RecyclerView android:id="@+id/main_rv" android:layout_width="match_parent" android:layout_height="match_parent" android:clipToPadding="false" app:layoutManager="androidx.recyclerview.widget.GridLayoutManager" app:spanCount="3" /> </LinearLayout> |
RecyclerViewの「app:spanCount」は画面に一つの行に表示する列の数を設定するための設定値
アプリ起動
・「app:spanCount」の値が「3」の場合

・「app:spanCount」の値が「1」の場合

終わりに
今回はRecyclerViewについて説明しました。
次回はGlideというライブラリについて説明していきます。


コメント