はじめに
DreamHanksのMOONです。
前回はQRコードをスキャンについて説明しました。
26. 【Android/Kotlin】QRコードをスキャン
今回は「CalendarView」というヴューについて説明していきます。
CalendarViewとは
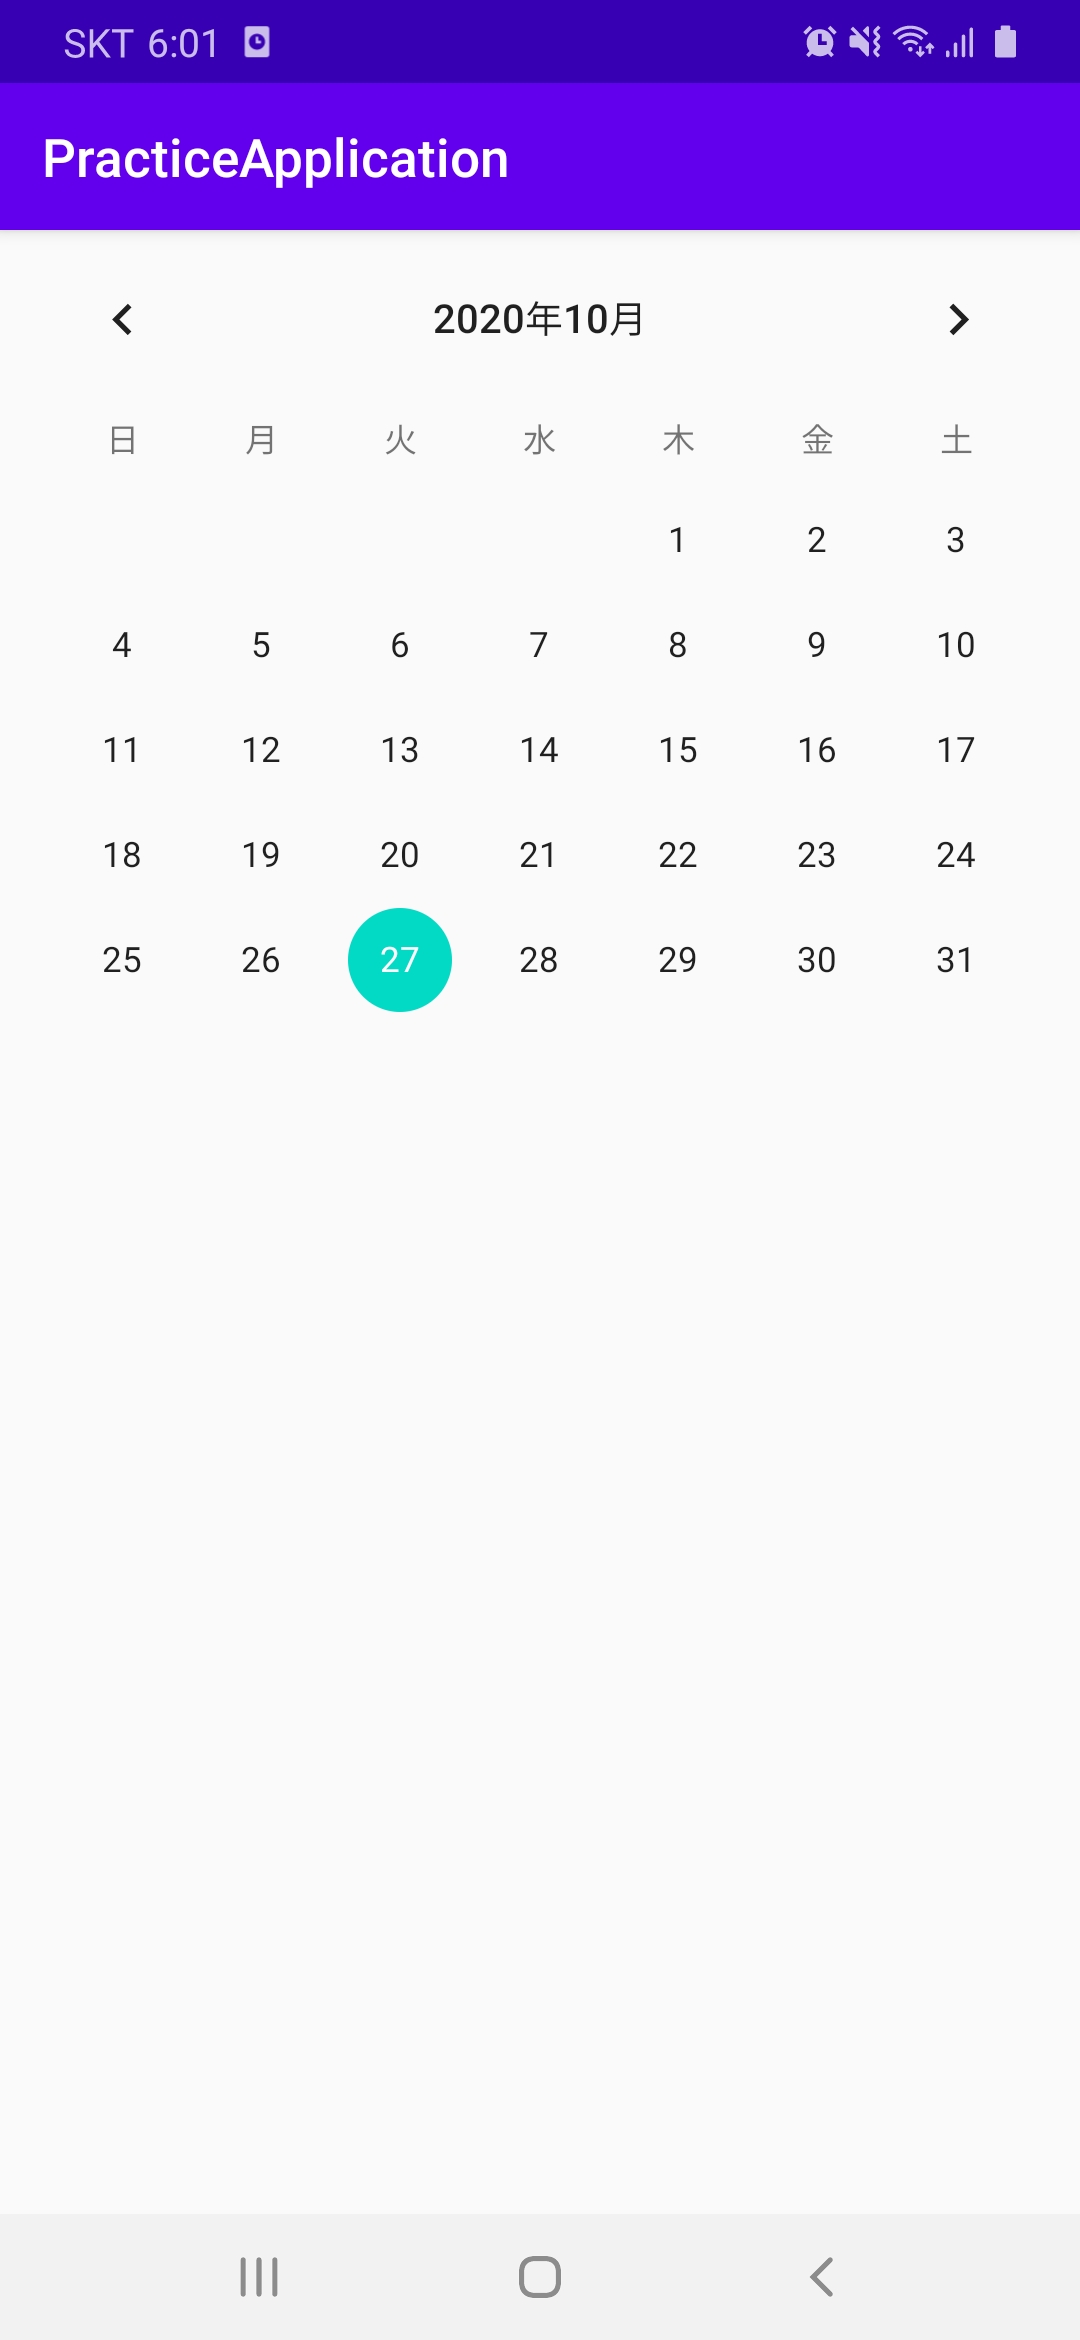
「CalendarView」は下の画像と同じようなカレンダーです。
このカレンダーでいろんなカスタムしてデザイン修正もできます。
今回は簡単に「CalendarView」の生成及び基本的な機能について見ていきます。

CalendarViewを追加
・レイアウトのxmlファイルを作成
activity_calendarview.xml
|
1 2 3 4 5 6 7 8 9 10 11 12 13 14 15 16 17 18 |
<?xml version="1.0" encoding="utf-8"?> <LinearLayout xmlns:android="http://schemas.android.com/apk/res/android" xmlns:app="http://schemas.android.com/apk/res-auto" xmlns:tools="http://schemas.android.com/tools" android:layout_width="match_parent" android:layout_height="match_parent" android:orientation="vertical" tools:context=".CalendarViewActivity" android:gravity="center"> <CalendarView android:id="@+id/calendar" android:layout_width="match_parent" android:layout_height="match_parent" android:layout_weight="1" /> </LinearLayout> |
・Activityを作成
|
1 2 3 4 5 6 7 8 9 10 11 12 13 14 15 16 17 18 19 20 21 |
package com.example.practiceapplication import android.os.Bundle import android.widget.CalendarView import android.widget.Toast import androidx.appcompat.app.AppCompatActivity class CalendarViewActivity : AppCompatActivity() { override fun onCreate(savedInstanceState: Bundle?) { super.onCreate(savedInstanceState) setContentView(R.layout.activity_calendarview) val calendar = findViewById<CalendarView>(R.id.calendar) //カレンダーの日付のクリックイベント設定 calendar.setOnDateChangeListener { view, year, month, dayOfMonth -> Toast.makeText(this, "" + year + "-" + (month+1) + "-" + dayOfMonth, Toast.LENGTH_LONG).show() } } } |
①「setOnDateChangeListener」というメソッドで日付のクリックイベントを設定
②year、month、dayOfMonthで年、月、日を出力することができます。
③monthは0~11なので1を足すと正確な月を出力することができます。
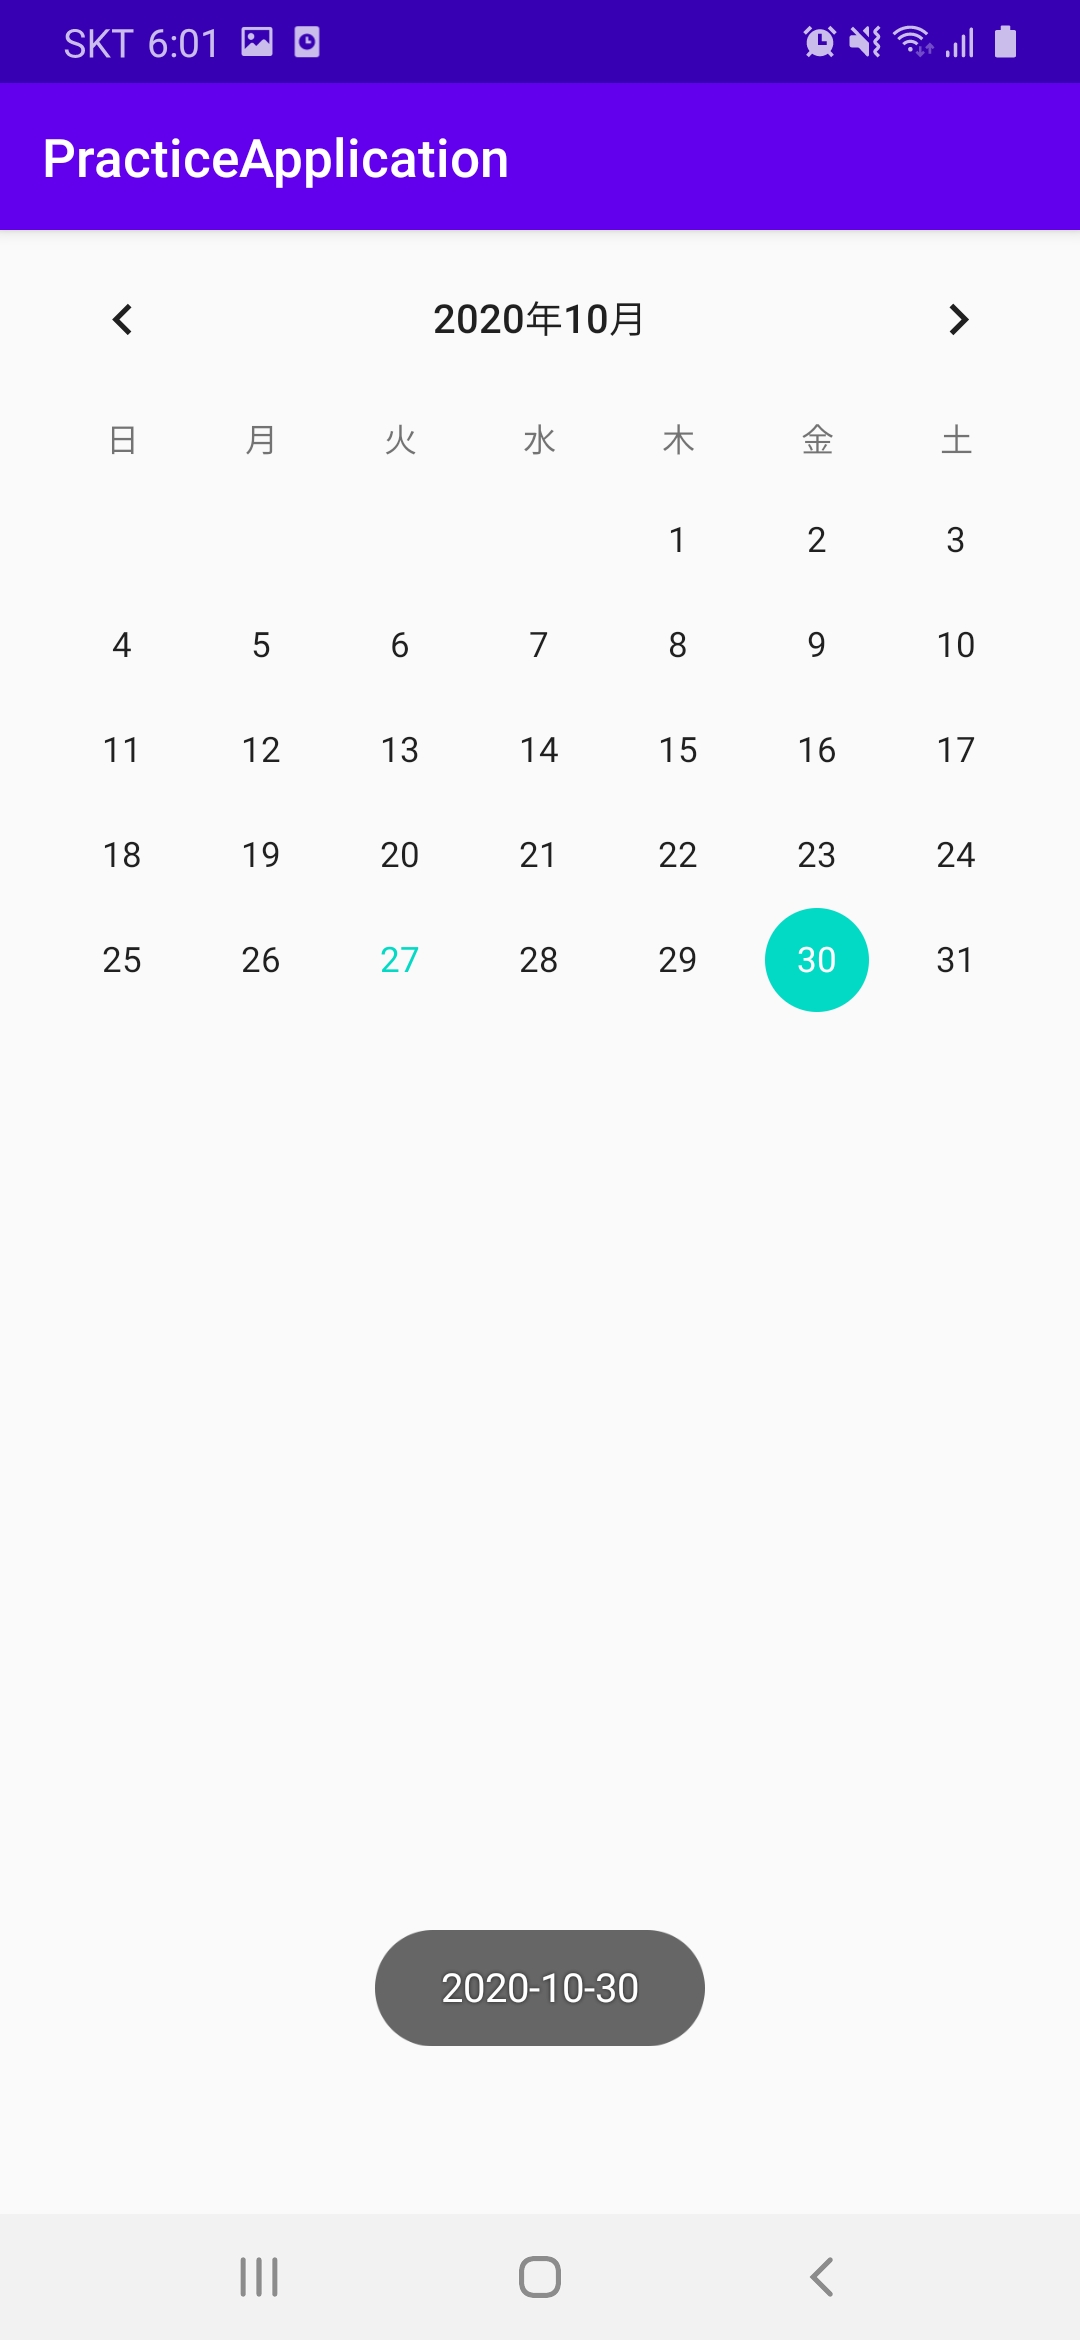
④Toastで日付を出力します。
アプリ起動
・初期の画面

・10月30日をクリックした場合

終わりに
今回は「CalendarView」というヴューについて説明しました。
次回は「FrameLayout」というLayoutについて説明していきます。


コメント