はじめに
DreamHanksのMOONです。
前回はカメラで写真を撮り、その写真を画面に表示しました。
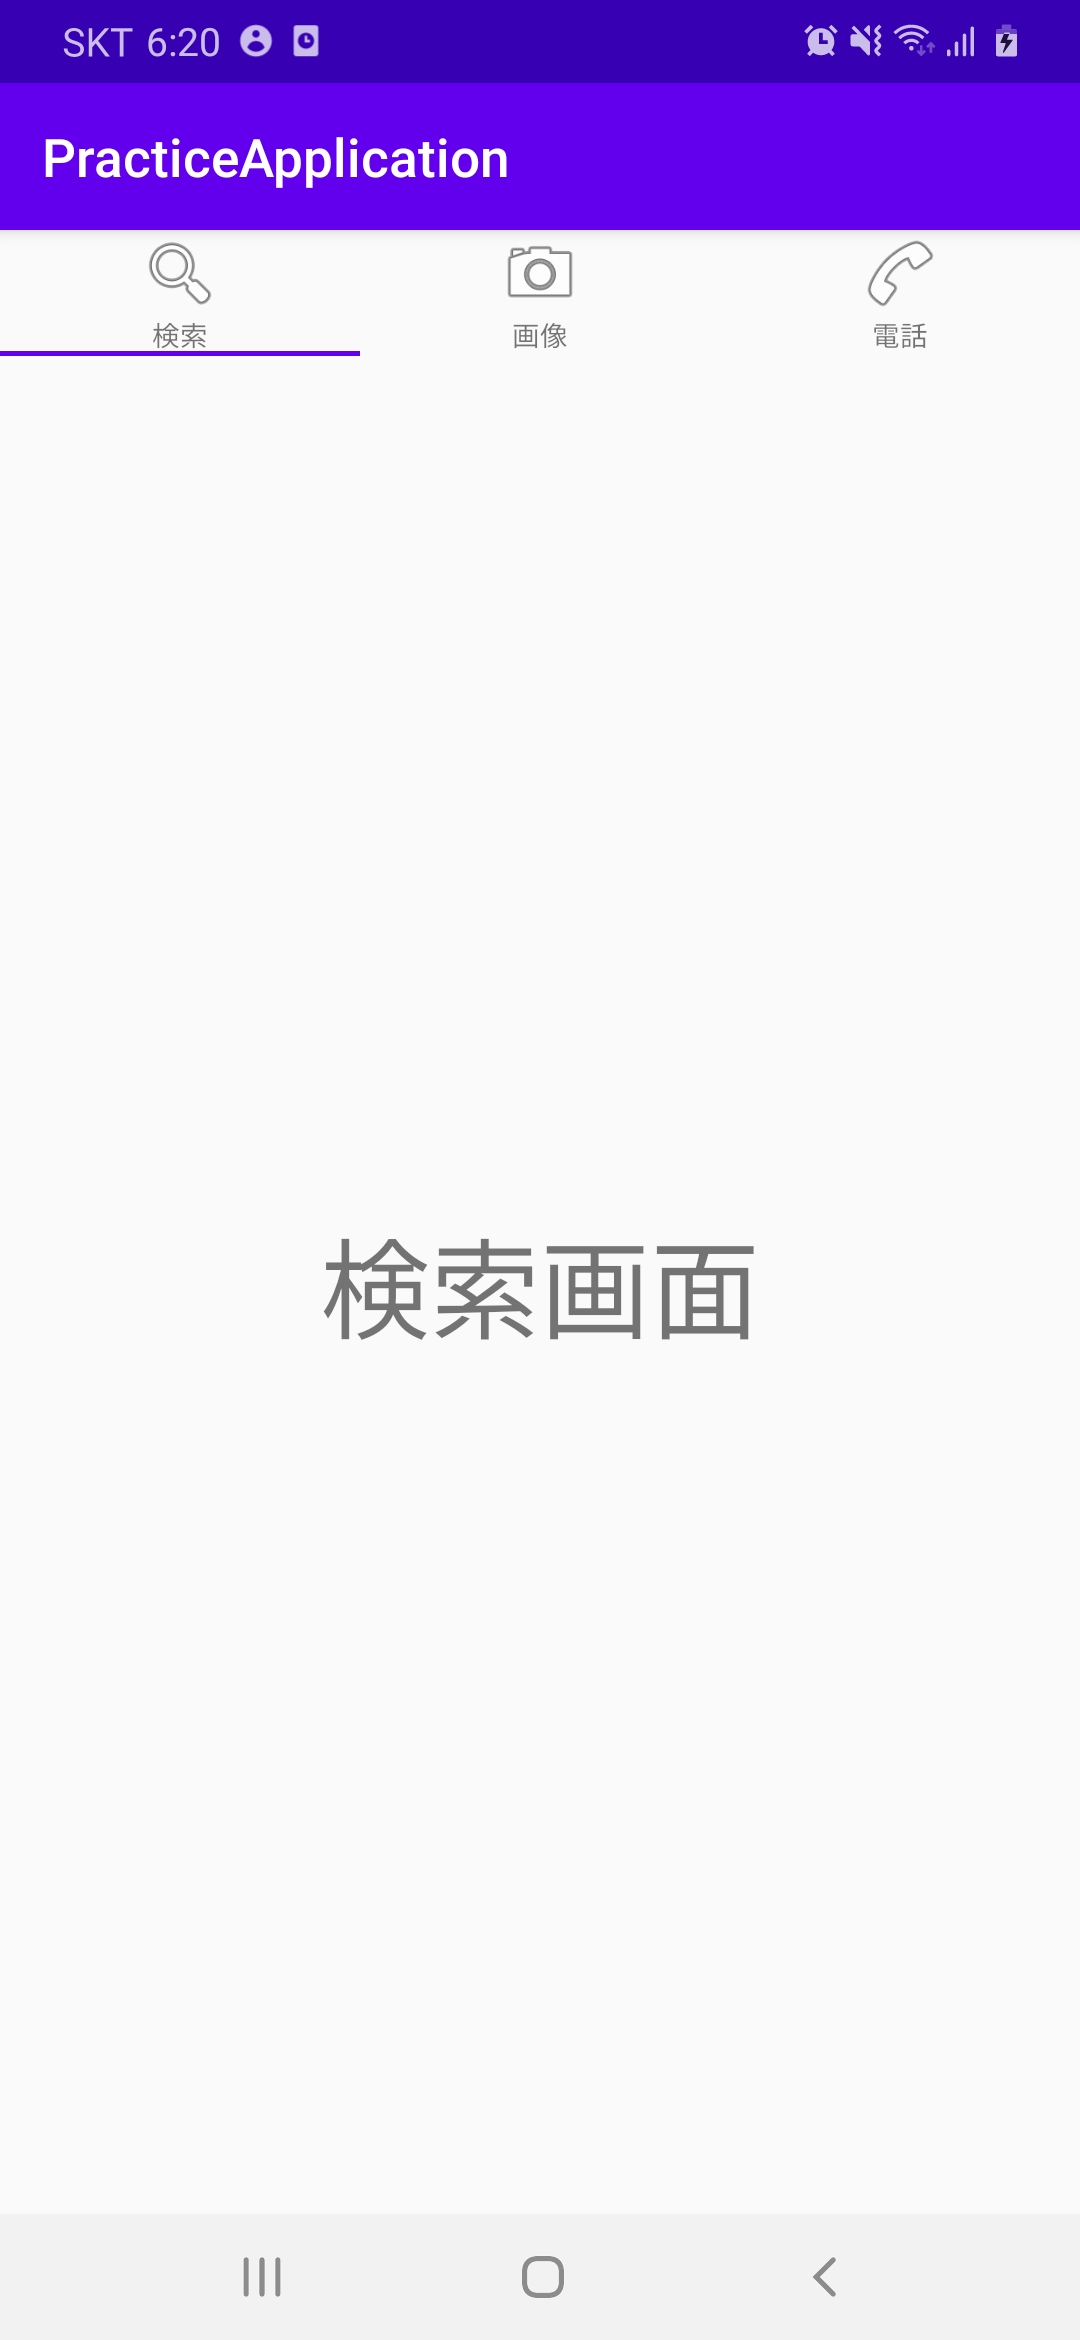
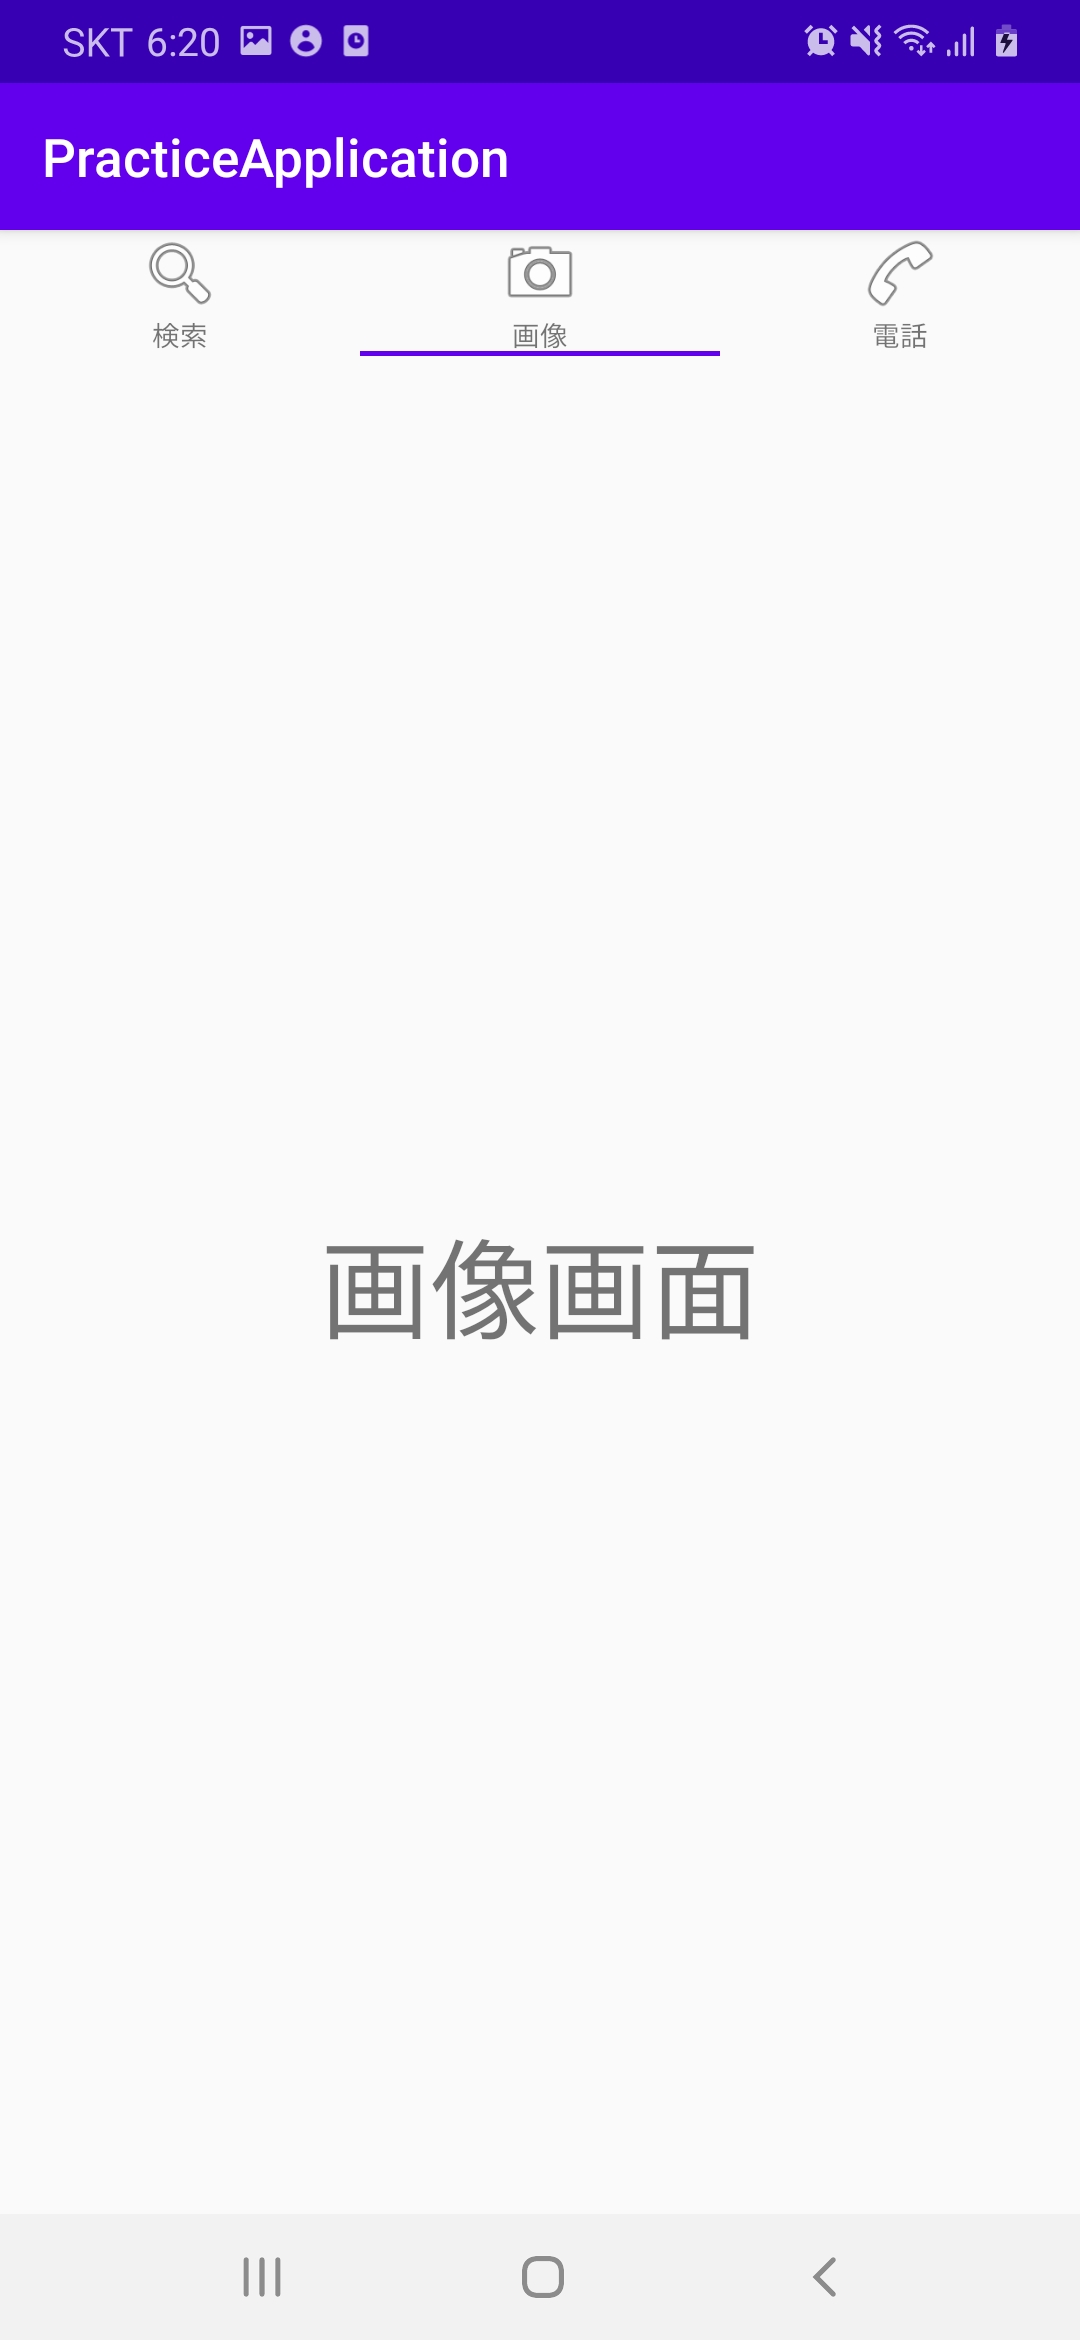
今回はViewPagerとTabLayoutでタブビュー機能をしていきます。
設定事項
今回は下記の作業が必要です。
・Fragmet.ktを作成
・Fragmentに対するPageAdapterを作成
・タブのアイテムのxmlを作成
・Activityとレイアウトのxmlを作成
Fragmet.ktを作成
FragmentTab.kt
|
1 2 3 4 5 6 7 8 9 10 11 12 13 14 15 16 17 18 19 20 21 22 23 24 |
package com.example.practiceapplication import android.os.Bundle import androidx.fragment.app.Fragment import android.view.LayoutInflater import android.view.View import android.view.ViewGroup import kotlinx.android.synthetic.main.fragment_tab.view.* class FragmentTab : Fragment() { var name = "" override fun onCreateView( inflater: LayoutInflater, container: ViewGroup?, savedInstanceState: Bundle? ): View? { val view =inflater.inflate(R.layout.fragment_tab, container, false) view.textView.text = name return view } } |
Fragmentに対するPageAdapterを作成
PageAdapter.kt
|
1 2 3 4 5 6 7 8 9 10 11 12 13 14 15 16 17 |
package com.example.practiceapplication import androidx.fragment.app.Fragment import androidx.fragment.app.FragmentManager import androidx.fragment.app.FragmentStatePagerAdapter class PageAdapter(fm : FragmentManager) : FragmentStatePagerAdapter(fm){ private var fragments : ArrayList<FragmentTab> = ArrayList() override fun getItem(position: Int): Fragment = fragments[position] override fun getCount(): Int = fragments.size fun addItems(fragment : FragmentTab){ fragments.add(fragment) } } |
タブのアイテムのxmlを作成
custom_tab_button.xml
|
1 2 3 4 5 6 7 8 9 10 11 12 13 14 15 16 17 18 19 20 21 22 23 |
<?xml version="1.0" encoding="utf-8"?> <LinearLayout xmlns:android="http://schemas.android.com/apk/res/android" xmlns:app="http://schemas.android.com/apk/res-auto" xmlns:tools="http://schemas.android.com/tools" android:layout_width="wrap_content" android:layout_height="wrap_content" android:orientation="vertical"> <ImageView android:id="@+id/tab_logo" android:layout_width="wrap_content" android:layout_height="wrap_content" android:layout_gravity="center_horizontal" android:src="@android:drawable/ic_menu_call"/> <TextView android:id="@+id/tab_text" android:layout_width="wrap_content" android:layout_height="wrap_content" android:layout_gravity="center" android:textSize="10sp" android:text="TextView" /> </LinearLayout> |
Activityとレイアウトのxmlを作成
TabActivity.kt
|
1 2 3 4 5 6 7 8 9 10 11 12 13 14 15 16 17 18 19 20 21 22 23 24 25 26 27 28 29 30 31 32 33 34 35 36 37 38 39 40 41 42 43 44 45 46 47 48 49 50 51 52 53 54 55 56 57 58 59 60 61 62 63 64 65 66 67 68 69 |
package com.example.practiceapplication import android.content.Context import androidx.appcompat.app.AppCompatActivity import android.os.Bundle import android.view.LayoutInflater import android.view.View import kotlinx.android.synthetic.main.activity_tablayout.* import kotlinx.android.synthetic.main.custom_tab_button.view.* class TabActivity : AppCompatActivity() { private lateinit var mContext : Context override fun onCreate(savedInstanceState: Bundle?) { super.onCreate(savedInstanceState) setContentView(R.layout.activity_tablayout) mContext = applicationContext initViewPager() } private fun createView(tabName: String): View { var tabView = LayoutInflater.from(mContext).inflate(R.layout.custom_tab_button, null) tabView.tab_text.text = tabName when (tabName) { "検索" -> { tabView.tab_logo.setImageResource(android.R.drawable.ic_menu_search) return tabView } "画像" -> { tabView.tab_logo.setImageResource(android.R.drawable.ic_menu_camera) return tabView } "電話" -> { tabView.tab_logo.setImageResource(android.R.drawable.ic_menu_call) return tabView } else -> { return tabView } } } private fun initViewPager(){ val searchFragment = FragmentTab() searchFragment.name = "検索画面" val cameraFragment = FragmentTab() cameraFragment.name = "画像画面" val callFragment = FragmentTab() callFragment.name = "電話画面" val adapter = PageAdapter(supportFragmentManager) // PageAdapter 生成 adapter.addItems(searchFragment) adapter.addItems(cameraFragment) adapter.addItems(callFragment) main_viewPager.adapter = adapter // ViewページャーにAdapterを設定 main_tablayout.setupWithViewPager(main_viewPager) main_tablayout.getTabAt(0)?.setCustomView(createView("検索")) main_tablayout.getTabAt(1)?.setCustomView(createView("画像")) main_tablayout.getTabAt(2)?.setCustomView(createView("電話")) } } |
activity_tablayout.xml
|
1 2 3 4 5 6 7 8 9 10 11 12 13 14 15 16 17 18 19 20 21 22 23 24 25 26 27 28 29 |
<?xml version="1.0" encoding="utf-8"?> <LinearLayout xmlns:android="http://schemas.android.com/apk/res/android" xmlns:app="http://schemas.android.com/apk/res-auto" xmlns:tools="http://schemas.android.com/tools" android:layout_width="match_parent" android:layout_height="match_parent" android:orientation="vertical" tools:context=".TabActivity"> <com.google.android.material.tabs.TabLayout android:id="@+id/main_tablayout" android:layout_width="match_parent" android:layout_height="wrap_content" app:layout_constraintBottom_toBottomOf="parent" app:layout_constraintEnd_toEndOf="parent" app:layout_constraintStart_toStartOf="parent" app:tabGravity="fill" app:tabIndicatorColor="@color/colorPrimary" app:tabMode="fixed"/> <androidx.viewpager.widget.ViewPager android:id="@+id/main_viewPager" android:layout_width="match_parent" android:layout_height="match_parent" app:layout_constraintEnd_toEndOf="parent" app:layout_constraintStart_toStartOf="parent" app:layout_constraintTop_toTopOf="parent" /> </LinearLayout> |
アプリ起動
・タブが「検索」になった場合

・タブが「検索」になった場合

終わりに
今回はViewPagerとTabLayoutでタブビュー機能を説明しました。
次回はRecyclerViewについて説明していきます。


コメント